If you’re a finance person, you’ve probably looked at Claude Code once and looked away.
A black terminal. Commands that mean nothing. Something for engineers, not for someone who spends their day in spreadsheets and annual reports.
**
**I’ve now been running my entire investment research workflow on Claude Code for sixty days. Screening, scraping, modeling, drafting reports, monitoring portfolios. The terminal stopped being intimidating somewhere around day three. By day ten, I had stopped opening Claude for research entirely.
Here’s what nobody told me, and what I want to tell you: Claude Code is for coding if you want to code. It’s for cooking if you want to cook. It’s for shopping if you want to shop. And if you’re really into finance, Claude Code is for finance too.
The “code” in the name is the most misleading part of the product.
This article is the setup guide I wish someone had handed me on day one. By the end of it, you’ll have Claude Code installed, a knowledge base that compounds every piece of research you do, and three tools bolted on that let Claude Code reach into the live web, drive a browser, and query your own notebooks.
If you’ve watched the video that goes with this, you’ll know the shape of it. The article goes deeper on the prompts, the file structure, and the rules that make the whole thing work.
Let’s start with the one idea that changed how I think about all of this.
Claude vs. Claude Code: The One Thing Nobody Explains
Claude and ChatGPT are chatbots. You ask, they answer. You ask again, they answer again. Useful, but limited. The conversation is the product.
Claude Code is different. Claude Code is Claude with hands.
Think about what happens when you ask ChatGPT to help with an investment research workflow. You can ask it to screen for a few stocks. You can paste in financials and ask for a DCF. You can give it a draft and ask it to clean up the language. But each of those is one step, with you in the middle, copying and pasting between the chat and the rest of your work.
Now picture a real research workflow. You screen the universe. You shortlist on a few parameters. You apply your firm’s internal framework to the shortlist. You pick two names. You pull financial statements for both. You build a model. You stress test the model. You arrive at an intrinsic value. You draft an equity research report. A senior analyst reviews it. You publish.
A chatbot can help with one step at a time. Claude Code can run the whole chain.
You give it the end goal. It opens a browser if it needs to. It scrapes data if it needs to. It writes files. It reads files. It runs five things in parallel if the task allows. It asks you for input only when it actually needs you. The work happens while you do something else.
That’s what “hands” means. ChatGPT is a brain you talk to. Claude Code is a brain that runs your workflows.
There’s a line I keep coming back to. A smart, hardworking person does more by doing more. A wise person does more by eliminating more. Claude Code is the eliminator. Most of what we call “research work” is actually data gathering, formatting, copying, pasting, switching tabs. Claude Code takes that off your plate so the only thing left is the part that actually requires you.
That is the unlock. Everything else in this article is just how to set it up.
Step One: Install Claude Code (The Easy Part)
If you'd rather watch this whole setup happen on screen, including the Playwright and Firecrawl install in the next section, I recorded a 16-minute walkthrough that covers everything end to end:
Go to the Claude Code page on Anthropic’s site. You’ll see two install commands, one for Mac and one for Windows. Copy the one for your machine.
- Official Claude Code setup docs: https://code.claude.com/docs/en/quickstart

If you’re on a Mac, open Terminal. If you’re on Windows, open PowerShell. Paste the command, hit enter, wait a minute. That’s the install.
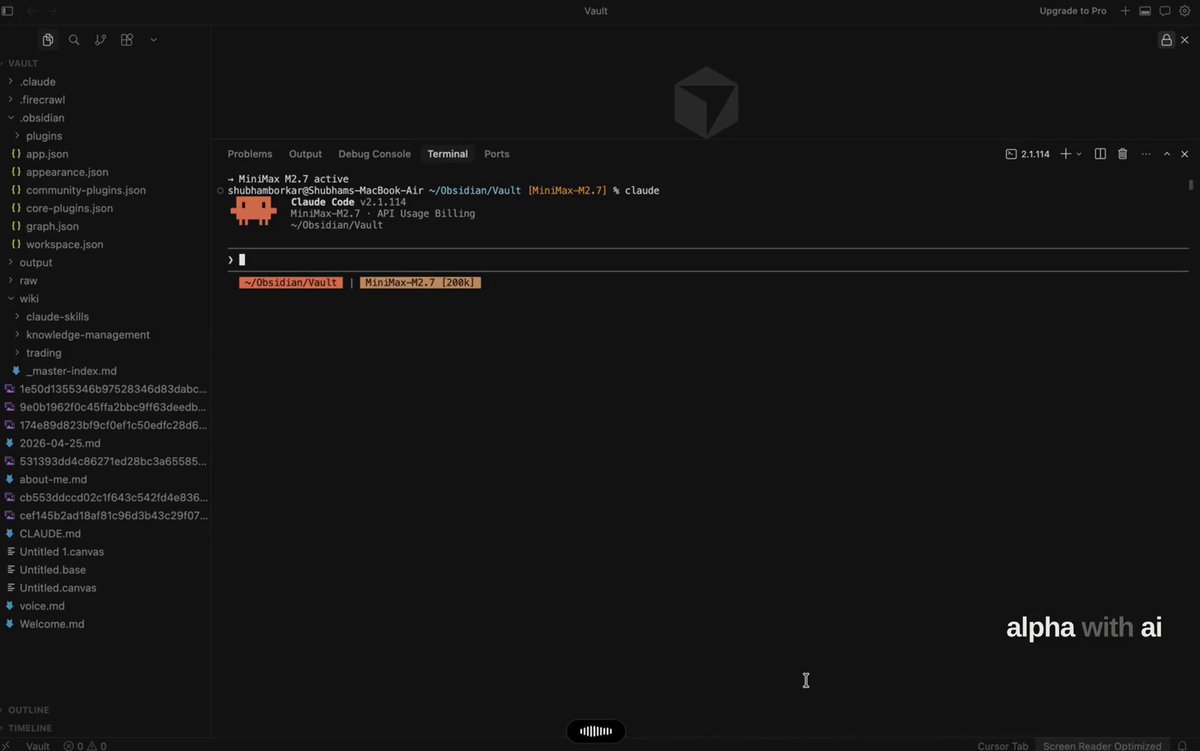
Now type claude and hit enter. The Claude Code prompt opens. You can start typing in plain English. Ask it anything. “Hi, I’m new here, how should I get started?” works fine. It will tell you.
That’s it. That’s the install.

There’s one more thing to do before you go further: download Cursor.
- Official Cursor Page: https://cursor.com/home
Cursor isn’t an alternative to the terminal. It’s where the rest of this system lives. When you set up the Obsidian knowledge base in the next section, you’ll open your Obsidian vault as a folder inside Cursor. Your raw, wiki, and output folders sit in the sidebar. Claude Code runs in a panel next to them. You can watch files get created, edited, and indexed in real time, in the same window. Everything you build from here on out happens in this one place.
You can still use the plain terminal if you want to. I sometimes do, especially when I want to watch Claude Code grind through something complex. But Cursor is where the daily work actually happens, because it’s the only place where the knowledge base, the chat, and the tools are all visible at the same time.
Claude Code on its own is useful, but it’s not what makes the system in this article work. The install is two minutes. The setup that actually changes your research is what comes next.
Optional, only if you don’t want a Claude subscription
One quick note before we move on. Everything from here assumes you have a Claude subscription, Pro or Max. If you don't, and you don't want to buy one just to experiment, there's a working alternative called MiniMax M2 that slots into Claude Code as a replacement engine at roughly seven percent of the cost. Set it up, then come back and pick up from the next section. Everything that follows works identically.
Step Two: Set Up Obsidian as Claude Code’s Memory
Claude Code on its own has no memory. Every session starts fresh. You can have a brilliant conversation with it on Monday, close the terminal, and on Tuesday it remembers nothing. For most coding tasks that’s fine. For research, it’s a problem. Research compounds. The note you took on a semiconductor company in March should be findable in November, alongside everything you’ve learned about the sector since.
This is what Obsidian solves. Obsidian is a free app that turns a folder on your computer into a personal research library. Each note is a plain text file. You can link notes to each other, organize them into topic folders, and search across the whole library instantly. There’s no database, no cloud, no lock-in. Your research lives on your machine, in files you can read with any text editor.
The trick is that Claude Code can read and write to that same folder. Once you set it up correctly, Obsidian becomes Claude Code’s long-term memory. You hand Claude Code the role of librarian. It files what you collect, summarizes what you read, links related ideas across topics, and pulls from the library every time you ask a question. Over time the library gets smarter, because every answer Claude Code gives you gets filed back into it.

Here’s how to build it.
Install Obsidian and create your vault
Download Obsidian from obsidian.md. It’s free for personal use, and works on Mac, Windows, and Linux.
Open Obsidian and click “Create new vault.” A vault is just a folder on your computer where Obsidian stores your notes. Name it whatever you want (mine is called Vault itself). Pick a location you’ll remember, somewhere in your Documents folder works fine. Obsidian will open the empty vault.

Now open that same vault folder inside Cursor. File → Open Folder → select your vault. You should see the folder name appear in Cursor’s sidebar, empty for now. This is where everything happens from here on.

Create the folder structure
Open Claude Code inside Cursor (the sidebar panel, or the terminal, your choice). Paste this prompt exactly:
1Crea esta estructura de carpetas para mi base de conocimiento:23- raw/ — esta es mi bandeja de entrada donde depositaré el material fuente4- wiki/ — este es tu dominio, escribirás y mantendrás todo aquí5- Crea un _master-index.md dentro de wiki/ con el encabezado "Índice de la Base de Conocimiento"6 y una nota que diga "Los temas se listarán aquí a medida que se creen."7- output/ — aquí es donde van los resultados de consultas e informes89Solo crea las carpetas y ese archivo. Nada más todavía.
Claude Code will create three folders and one file. Open Obsidian and you’ll see them in the sidebar. That’s your skeleton.

Three folders, three jobs. raw/ is your inbox where you dump anything you want the system to learn from: articles, transcripts, screenshots, notes. wiki/ is the librarian’s domain, where Claude Code writes structured summaries, organizes them into topic folders, and maintains a master index of everything. output/ is where finished work lands: research reports, query answers, analyses you want to keep separate from the library itself.
The rulebook (CLAUDE.md)
This is the most important file in the whole system. CLAUDE.md is the rulebook Claude Code reads every time you open it inside this vault. You write the rules once, and Claude Code follows them forever. Without this file, Claude Code is just a clever assistant. With it, Claude Code is a disciplined librarian.
Create a file called CLAUDE.md in the root of your vault (not inside any of the three folders, but next to them). Paste this in:
1Este archivo le indica cómo mantener esta base de conocimiento a lo largo de cada sesión.23## Reglas de la Base de Conocimiento45- Esta es una base de conocimiento mantenida por un LLM. Tú eres el bibliotecario.6- La carpeta wiki/ es TU dominio: tú escribes y mantienes todo en ella.7 Rara vez edito archivos de wiki/ directamente.8- raw/ es la bandeja de entrada. Cuando deposite archivos aquí, los procesas en wiki/9 durante un paso de "compilación".10- wiki/_master-index.md es el punto de entrada. Enumera cada carpeta de tema con11 una descripción de una línea. Mantenlo siempre actualizado.12- Cada tema tiene su propia subcarpeta en wiki/ (ej., wiki/agentes-ia/) con su13 propio _index.md que enumera todos los artículos de ese tema con descripciones breves.14- Usa siempre [[enlaces wiki]] para conectar conceptos relacionados entre temas.15- Al compilar material fuente:16 1. Lee el archivo fuente17 2. Decide a qué tema pertenece (o crea uno nuevo)18 3. Escribe un artículo wiki con puntos clave y enlaces relevantes19 4. Actualiza el _index.md de ese tema20 5. Actualiza wiki/_master-index.md21 6. Si un archivo fuente abarca varios temas, crea artículos en ambos y enlázalos cruzadamente22- Mantén los artículos concisos: viñetas en lugar de párrafos.23- Incluye una sección ## Puntos Clave en cada artículo wiki.24- output/ es para resultados de consultas e informes generados.25- Al responder preguntas, lee primero _master-index.md para navegar, luego26 profundiza en el _index.md del tema relevante, luego lee artículos específicos.27- Cuando te pida "compilar", procesa todo en raw/ que aún no se haya compilado en wiki/.28- Cuando te pida "auditar" o "revisar", examina wiki/ en busca de inconsistencias,29 enlaces rotos, vacíos y sugiere mejoras.
Save the file. From now on, every session starts with Claude Code reading this rulebook.
The daily input: Web Clipper
Web Clipper Page: obsidian.md/clipper
You need a way to get articles into your raw/ folder without copying and pasting. Install the Obsidian Web Clipper extension on your browser (Chrome, Brave, Edge, Firefox all supported).
Open the Web Clipper settings. Add your vault. Then go to Templates and edit the Default template:
- Vault: select your vault
- Note location: raw
- Note name: {{date|date:"YYYY-MM-DD"}}-{{title|safe_name}}
Now any article you read on the web becomes a clean markdown file in your inbox with one click. An earnings transcript, an FT piece, a 10-K excerpt, a Substack post, all get clipped the same way.
One optional add-on: install the Local Images Plus plugin inside Obsidian (Settings → Community Plugins → Browse → search “Local Images Plus”). When you open a clipped note, this plugin downloads every image from the article into your vault, so your library stays intact even if the original page goes down.
The daily workflow: four verbs
Once everything is set up, the workflow is four verbs.
Clip. You see something worth keeping. One click in your browser, it lands in raw/. You don’t decide where it goes, you don’t write a summary, you just clip it.
Compile. Once a week, or whenever your inbox feels full, open Claude Code and type:
1Compila todo lo que hay en raw/ en la wiki. Para cada archivo:21. Léelo e identifica el tema central32. Crea o encuentra la carpeta de tema correcta en wiki/43. Escribe un artículo wiki con un resumen, puntos clave y [[enlaces wiki]]5 a cualquier concepto relacionado64. Actualiza el _index.md del tema75. Actualiza wiki/_master-index.md89Haz enlaces cruzados entre temas cuando sea relevante.
Claude Code reads each clipped article, decides which topic it belongs to, writes a structured summary note, files it in the right folder, and updates the indexes. By the time you finish your coffee, your inbox is empty and your library is bigger.
Query. Ask the library questions. Simple ones: “What were the key findings from the Bain semiconductor report I clipped last month?” Cross-referencing ones: “How does the slowdown in Chinese auto exports relate to what I’ve been reading about commodity demand?” Synthesis ones that file the answer back into the library: “Based on everything in the wiki, what are the main bull and bear cases on Indian specialty chemicals? Save your answer as a new wiki article and link it to the sources you referenced.”
That last query is the move that makes the system compound. Every question you ask becomes a new note. Every note links to its sources. The library grows smarter every time you use it.
Audit. Once a month, type: “Audit the wiki. Look for inconsistencies, broken links, missing cross-references, and gaps in coverage. Don’t make changes yet, just give me a report.” Claude Code walks the whole library and tells you where it’s getting fuzzy. You decide what to fix.
That’s the system. Inbox, librarian, library, output. Four folders, one rulebook, four verbs.
The reason this matters more than it looks: the system is the discipline. Anyone can install Obsidian and Claude Code. The reason your research compounds instead of leaking is that the rulebook forces consistency. Every clip gets filed the same way. Every summary follows the same format. Every query has access to everything you’ve ever read. After sixty days of running this, I can ask Claude Code “what have I learned about position sizing this quarter” and get a real answer in under a minute, drawn from articles I’d half-forgotten clipping.
Now we add the parts that let Claude Code reach beyond your library, into the live web.
Step Three: Give Claude Code Hands on the Web (Playwright + Firecrawl)
The knowledge base you just built is powerful, but it’s also closed. It only knows what you’ve fed into it. For real research work, you need Claude Code to reach out into the live web: pull a balance sheet from a screener, scrape an investor relations page, search for the latest filings on a company you’re tracking. That’s what these next two tools do.
Playwright lets Claude Code drive a real browser. Firecrawl lets Claude Code search and scrape the web at scale. Both are free and open source. Both install in about two minutes. Together they’re the difference between a librarian who only reads what you bring home and a librarian who can also walk to the library across town and bring back what you need.
Playwright: the browser
Playwright is a browser automation tool from Microsoft. Once it’s installed, Claude Code can open a browser, navigate to any page, click buttons, fill forms, log into accounts, and read what’s on the screen, all without you touching the mouse.
For finance work, this matters in places where the data lives behind interaction. A screener that requires you to set ten filters before showing results. An investor relations page that hides quarterly numbers behind a dropdown. A regulator’s portal that needs you to accept a disclaimer before downloading a filing. Anywhere a regular scraper would fail because the page expects a human, Playwright lets Claude Code be that human.
To install it, open Claude Code in your vault and paste:
1Quiero instalar Playwright CLI de Microsoft para que puedas controlar un navegador2en mi nombre. El repositorio está en https://github.com/microsoft/playwright-cli.3Guíame a través de la instalación paso a paso para mi máquina [Mac / Windows],4para principiantes, y ejecuta los comandos que necesites ejecutar.
Claude Code will install it, walk you through any prompts, and confirm when it’s ready. Test it by asking something simple: “Open a browser, go to screener.in, and tell me what’s on the homepage.” If Playwright is installed correctly, a browser window opens, navigates to the page, and Claude Code reports back what it sees.
Firecrawl: the web scraper
Firecrawl does something different. Where Playwright is a hands-on browser, Firecrawl is a fast, programmatic way to pull clean text from any web page or run a web search and pull text from the top results. It converts whatever it finds into clean markdown files that Claude Code can read directly.
The use case finance people will recognize immediately: you want to pull insider trading data from Finviz for the last two weeks. You want to scrape an annual report from a company’s IR page. You want to search for “latest news on Indian specialty chemicals” and pull the top ten articles into your knowledge base. Firecrawl does all three with a single command each.
To install:
1Quiero instalar Firecrawl CLI para que puedas buscar y extraer contenido de la web2en mi nombre. La documentación oficial está en https://docs.firecrawl.dev/sdks/cli.3Guíame a través de la instalación paso a paso para mi máquina [Mac / Windows],4para principiantes, y dame todos los comandos que necesite ejecutar.
Once installed, Firecrawl becomes a tool Claude Code can call directly from the terminal. You don't have to invoke it manually each time. When a task requires the live web, Claude Code recognizes it has Firecrawl available and uses it automatically.
What this looks like in practice
Here’s a real prompt I ran last week. The setup: I wanted to deploy capital across five names and only had two on my shortlist. I needed three more.
1Estoy buscando nombres para desplegar capital. Ve a finviz.com, extrae los datos2de operaciones con información privilegiada de las últimas dos semanas de empresas3cotizadas en EE.UU. Analiza los datos en busca de señales de compra fuertes.4Dame una lista de los 10 mejores a seguir, con el razonamiento para cada nombre.5También señala banderas rojas y nombres a evitar.
Claude Code asked permission to use Firecrawl. I said yes. It went to Finviz, pulled the data, parsed it, ran the buy-signal logic, cross-checked fundamentals, and came back with a ranked list of ten names. Each one had a thesis, a list of insider purchases (with who bought, when, and how much), key risks, and a summary scorecard. Three minutes start to finish.
1:16
If I’d done that manually, it would have been 90 minutes minimum, and I’d have introduced errors copying data between Finviz and Excel. Claude Code did it without leaving the terminal.
One thing about permissions
Every time Claude Code wants to use a tool like Firecrawl or Playwright, or modify a file, or run a command, it asks for permission. By default, this means a yes/no prompt every few steps. Useful when you’re learning. Annoying once you trust the system.
There’s a flag called --dangerously-skip-permissions that turns the prompts off entirely. Claude Code can then run any tool, modify any file in your vault, and execute commands without checking with you each time. The name sounds alarming, and it should. You’re handing Claude Code full access to your working directory.
I’ve been running with this flag on for sixty days. Nothing has broken. No file deleted by accident, no command run that shouldn’t have been run, no security issue. What changed is that I stopped sitting in front of the terminal waiting to click “yes.” I started giving Claude Code a task and walking away. By the time I came back with coffee, the task was done.
The reason this works is the rulebook. CLAUDE.md tells Claude Code exactly what its job is and what the boundaries are. Combined with the fact that Claude Code only has access to the vault folder you opened, not your whole machine, the risk is much smaller than the name of the flag suggests. I’d recommend running with permissions on for the first week so you can see what Claude Code is doing. Once you trust the pattern, turn permissions off and let it work.
That’s a personal call. Some readers will keep permissions on forever and that’s fine. The system works either way.
What 60 Days Has Taught Me
The setup above takes about an hour. The system it creates is something I’m still learning to use sixty days in.
A few things have surprised me.
The first is how quickly the terminal stopped feeling like a coding tool. By the end of the first week, I was typing into Claude Code the same way I type into ChatGPT. Plain English, no commands, no syntax. The intimidation factor people warn about is real for the first day, and gone by the third. If you’re a finance person reading this and hesitating, you’re hesitating about a problem that won’t survive the first session.
The second is what happens when you stop being a chatbot user and start being a workflow operator. The shift is subtle but everything downstream changes. You stop asking Claude Code to “help you” with one task and start handing it the whole task. Screen these names, run them through this framework, pull financials for the survivors, build models, draft a one-pager on each. You give it the end goal and walk away. The work happens in the background. You come back to a folder of finished output.
The third is how much research used to leak. Before this system, I had research scattered across Notion, Apple Notes, browser bookmarks, downloaded PDFs in five different folders, and a Substack drafts folder I rarely opened. I’d rediscover the same insight twice, sometimes three times. The Obsidian knowledge base ended that. Everything I read now lands in one place, gets filed by Claude Code into the right topic, and gets pulled back when I ask a related question six weeks later. Nothing leaks. Information compounds.
One more tool worth knowing about: NotebookLM. It’s Google’s hosted research tool, and it solves a different problem than Obsidian. Obsidian is your library. NotebookLM is a focused workspace for one specific research target: a single company, a single sector, a batch of filings. You upload the sources, and NotebookLM gives you grounded, cited answers across just those documents. There’s a Python wrapper that lets you query a notebook directly from inside Claude Code, which means you can build a workflow where Claude Code pulls from your Obsidian library and a focused NotebookLM source set in the same prompt.
What’s coming next
Este artículo es parte de una serie. Ahora que la configuración está lista, las próximas piezas profundizarán en flujos de trabajo financieros específicos: un flujo completo de investigación de renta variable que se ejecuta de principio a fin dentro de Claude Code, un flujo de gestión patrimonial para priorizar llamadas de clientes después de un evento de mercado, un flujo de auditoría contable mensual y un sistema de monitoreo de cartera que se ejecuta en un servidor virtual y te notifica cuando algo requiere atención. Cada uno de estos utilizará el sistema que acabas de construir.
Si quieres el resto de la serie a medida que se publique, ya estás en el lugar correcto al leer esto.
Claude Code es para programar si quieres programar. Es para cocinar si quieres cocinar. Es para comprar si quieres comprar. Y si te apasionan las finanzas, es la herramienta de investigación más poderosa que puedes tener en tu equipo ahora mismo. La hora que dediques a configurar esto es la hora en que tu investigación deja de filtrarse y comienza a acumularse.
Eso es todo.
Si esto fue útil - sigue mi canal de Telegram:


